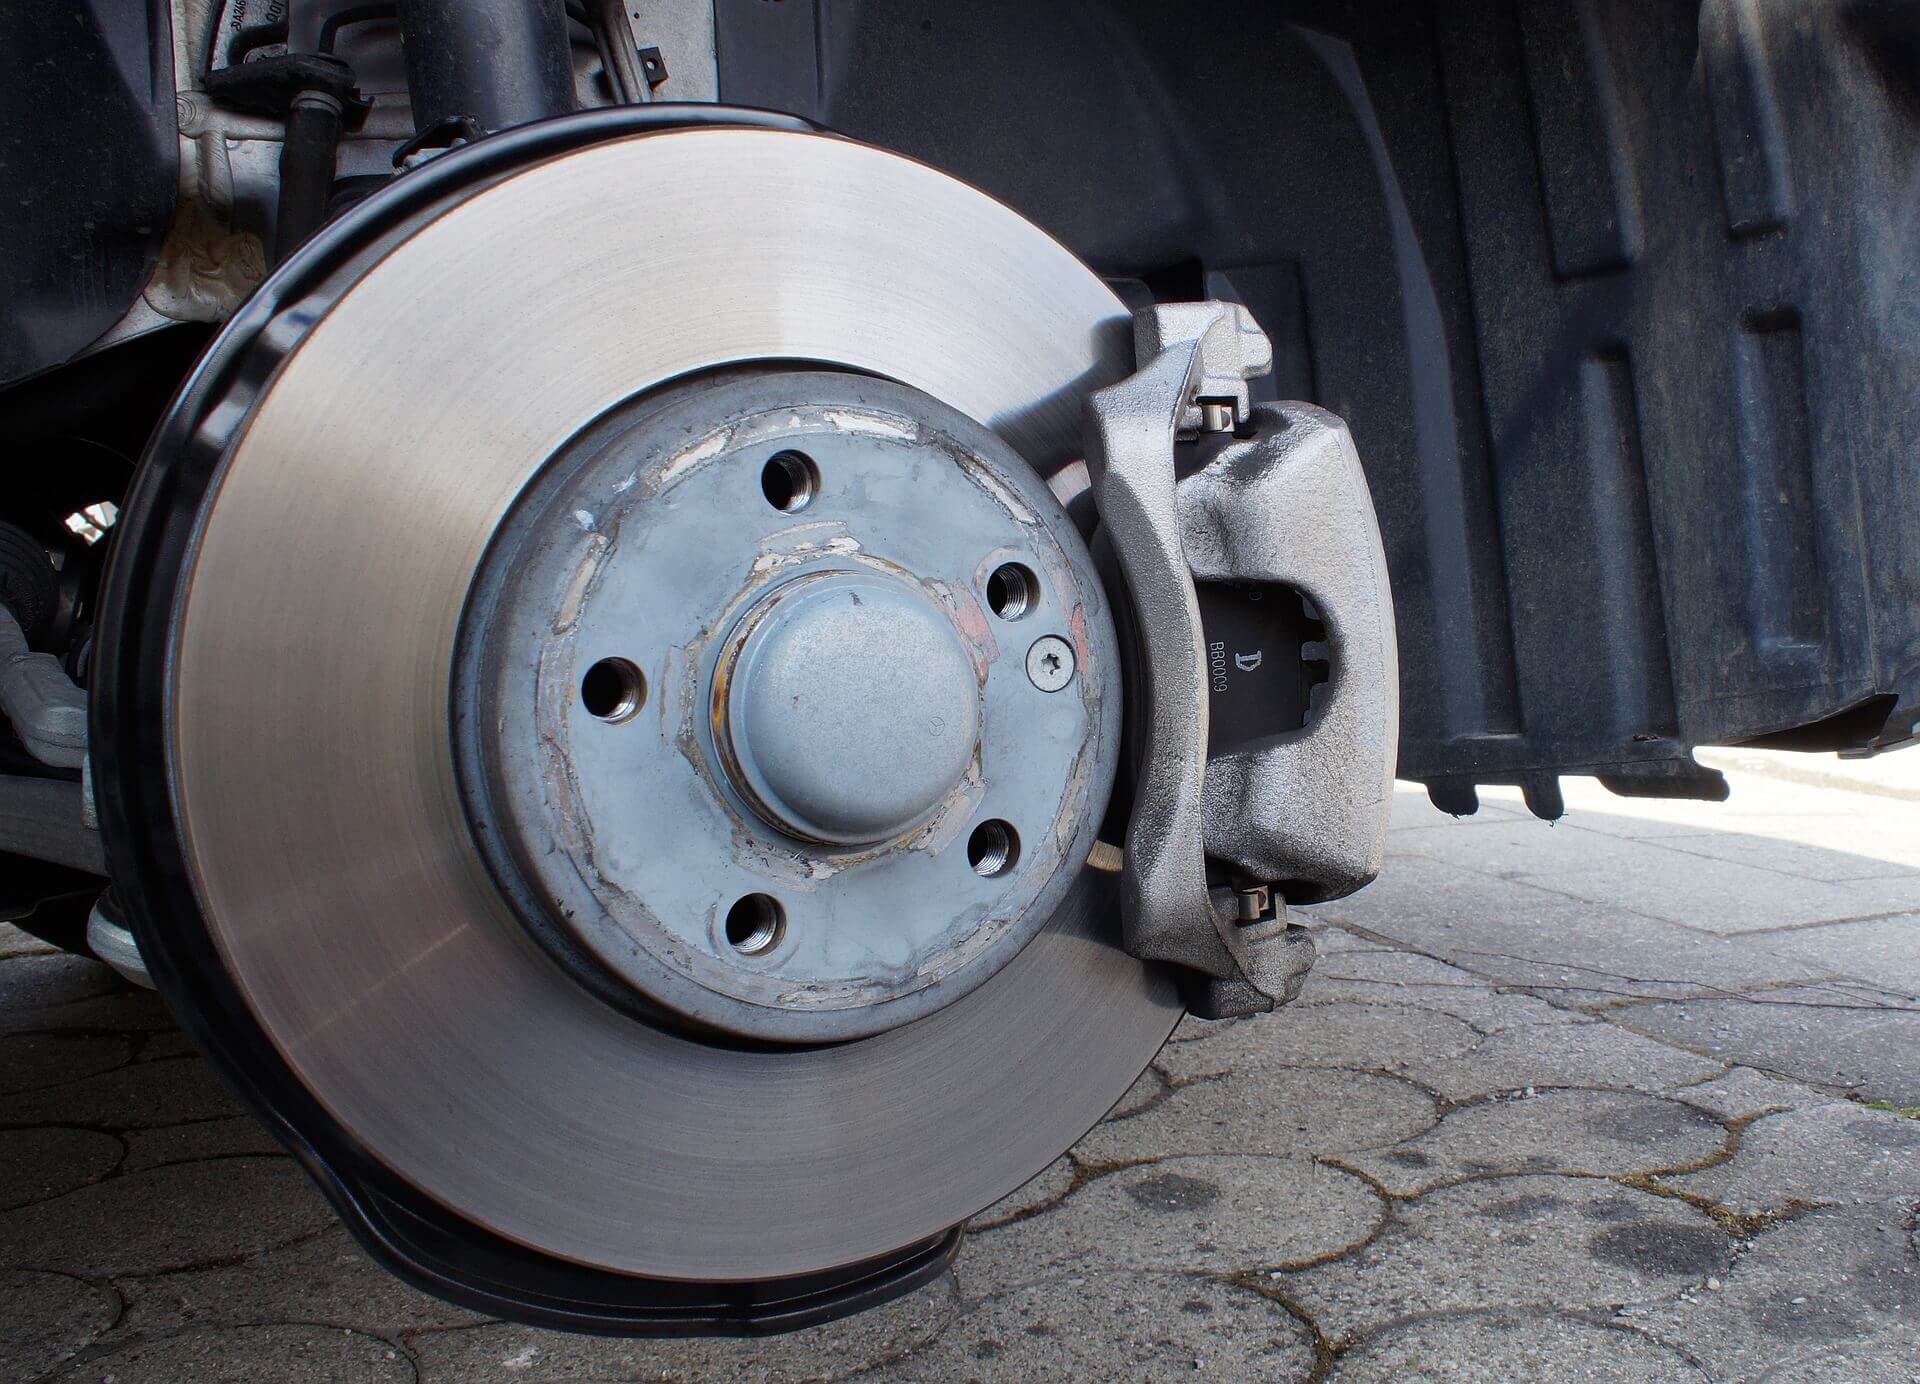
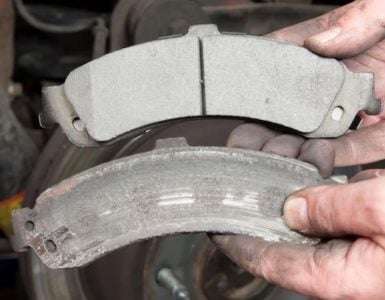
Aside from brake rotors, the most regularly serviced components in any disc brake system are the brake pads. These parts serve as the direct friction point between the car’s pedal, the brake caliper, and the rotor. Together, these parts slow a rotor’s rotation and stop a car’s wheels.
To do a DIY brake job, you’re going to need a constellation of tools, components, and lubricants. Here’s the list:
- Torque wrench
- Socket
- Powered wrench
- Manual hammer
- Hammer punch
- Collection of crescent wrenches
- Replacement pads
- Flashlight
- Digital caliper
- Jack
- Jack stand
- Fluid catch-container
- Work stool
- ¼” clear flexi-tube to bleed the brake system
- Can of brake parts cleaner
- Can of brake fluid
- Packet of brake lubricant
Once you have all the right elements in hand, the DIY process is as follows:
1. Remove the wheel.
2. Remove the caliper retention pins.
3. Remove the caliper retention spring.
4. Inspect the rotor face for any visual damage along with ensuring that the rotor thickness is nominal (this value is typically stamped on the rotor hub). Use a digital caliper to measure proper thickness.
5. Place a properly-sized box wrench over the caliper’s bleed screw.
6. Place the clear flexi-tube over the top of the bleed screw, open the port, and squeeze the piston/pad integration together, thereby bleeding the caliper of any captured brake fluid. Once the process is complete, re-tighten the screw.
7. Slide both the front/ back brake pads out of the caliper.
8. Remove and retain any original anti-squeal shims, as they will be used for the replacement pads.
9. Clean the entire brake assembly with chemical liquid.
10. Add brake lubricant to the anti-squeal shims and replace them on the new pads. (Don’t let any brake lubricant touch the pad faces. Only handle the pads on the sides when installing the anti-squeal shims)
11. Slide the replacement pads/shims into the calipers, ensuring that all pin-holes line up accordingly.
12. Return the retention spring.
13. Return the retention pins.
14. Repeat the same process for all three wheels if necessary.
This is a general process, each brand will offer slightly different components and retention elements. You can save lots of money on brake repairs if you pay attention to the performance of your pads on a regular basis.
When Should You Replace Your Brake Pads?
Although there are no specific metrics for when to replace brake pads, here are some general rules to follow:
Consumer cars – Depending on how the car is driven, most pads should be replaced at the 50,000-mile mark. (By the way, if you want instructions for more DIY brake replacement, check out this article.)
Performance cars – It is expected that brake pads in a performance car will experience much harder use than consumer use. Investigate pad use at 5,000 miles.
Racing cars – The racetrack is the most demanding on brake pads. They should be inspected after each lapping session, practice, and after an event is completed.