
Disc brakes are pretty easy and straightforward to replace. Drum brakes are a little more complicated. Many car owners know how to replace disc brakes, but not drum brakes. It may be because drum brakes are built to last 100K-150K miles. So replacing drum brakes is a lot more uncommon than replacing disc brakes.
If you have a set of drum brakes that need replacing, you may be wondering what the process entails. That’s where this tutorial comes in. We’ll show you how to replace the drum brakes on your vehicle.
How Hard Is It To Replace Drum Brakes?
Replacing drum brakes is not as complicated as people think. Drum brakes have a different layout than disc brakes. They also function differently. Yet, they’re just as easy to replace. There are a few specialized tools that are needed for the job, but they are all pretty inexpensive. Your local auto parts store may also loan them to you. It helps to have a:
- Drum brake adjuster tool
- Brake spring pliers
- Brake retaining spring tool
Brake springs are very small and are not dangerous to remove, unlike springs on struts. But they do require some special tools.
How Long Does It Take To Replace Drum Brakes?
That depends on your particular vehicle. On average, replacing a pair of drums and shoes takes about two hours from start to finish. However, if you need to replace other components as well, it can take longer. Since drum brakes last so long, it’s a good idea to replace the wheel cylinder, adjuster, and springs when you replace the drums and shoes.
Replacing drum brakes is an easy job, provided you have the right tools and supplies on hand.
Does A Drum Brake Adjuster Tool Matter?
You don’t need a drum brake adjuster tool to replace your drum brakes. A drum brake adjuster tool is a tapered metal stick that’s bent a certain way. It makes it easier to rotate the brake drums’ adjusting screws.
An entire drum brake replacement tool kit can be purchased for less than $30. We recommend buying or borrowing a kit, it will make the job much easier to do.
1. Prepare The Vehicle For Service
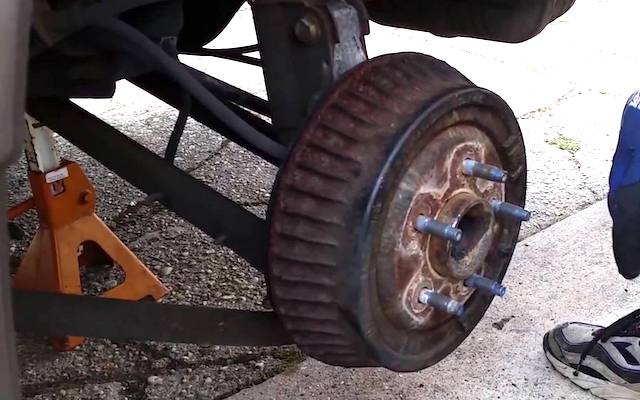
The first step in replacing drum brakes is preparing the vehicle.
- Make sure that the parking brake is disengaged.
- Loosen the lug nuts on each wheel you’re going to remove. Don’t remove the lug nuts. Just loosen them.
- Raise your vehicle and secure it on jack stands. You can only raise the rear of your vehicle, where the drum brakes are, if you want. If you do this, do not use the parking brake to secure the vehicle. Instead, secure the front wheels with tire chocks.
- Remove all the wheels you need to access the drum brakes.
Don’t forget to prepare yourself, too. To protect yourself, put on the following things:
- Protective gloves
- Safety glasses
- A face mask (Old brake drum shoes may contain asbestos, so protect your lungs from the brake dust)
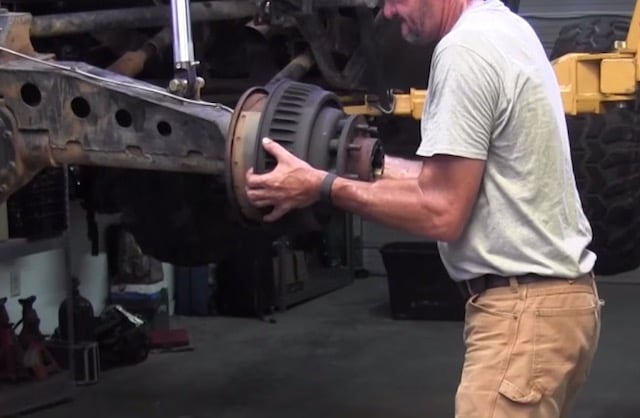
2. Remove The Brake Drum
To access the assembly, you need to remove the brake drum first. If there are any retention screws, remove them first. Then rock the drum back and forth while pulling it away from the hub. If it’s stuck, spray rust penetrant where the drum meets the hub. Wait a few minutes, then whack it with a rubber mallet. If that fails, look for a threaded hole near the center of the drum. Find the correct sized bolt, and screw the bolt in until the drum pops free.
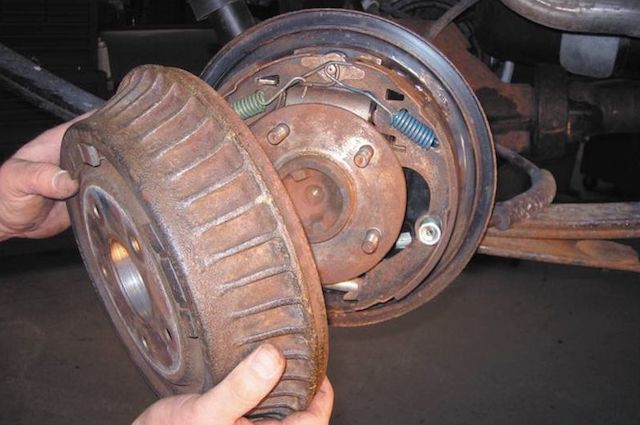
3. Clean The Drum Brake Assembly With Brake Cleaner
Once you remove the drum, you’ll see the drum brake assembly. Put an oil pan underneath the assembly. Next, liberally spray the assembly with brake cleaner. The cleaner will help loosen and remove any grease and dust that’s on everything.
Cleaning excessive grease and brake dust from the assembly will cut down on:
- Noise
- Vibration
- Uneven wear
After it’s clean, inspect the brakes for any damage or excessive wear. You want to know what you need to replace. Doing this now will prevent the need to open up the brake assembly again later to replace an overlooked worn or damaged part.
4. Remove The Drum Brake Shoe Assembly
First, you’ll need to remove the brake shoe assembly. This is really easy. One of the brands we carry, Raybestos, put together an easy-to-follow tutorial:
Here are the steps you need to follow:
- Remove the return springs. Don’t use pliers to do this. Use a special spring removal tool instead.
- Remove the hold down springs. Use another special tool to do this. The tool is called a spring compressor tool. You would need to unlock a small hold down pin, and the tool will help you achieve it.
- Remove the brake shoes. Do this by removing the pins and washers with needle nose pliers.
- If your drum brakes also serve as the parking brake, remove the parking brake cable retainer clip. You can do this with a flat head screwdriver.
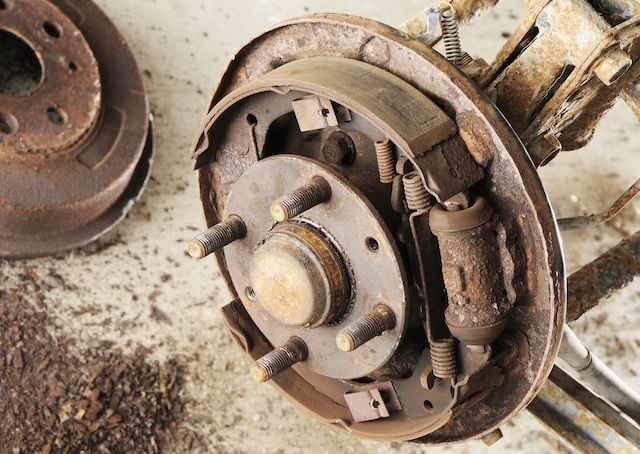
5. Inspect The Wheel Cylinder For Any Leaks
If you find any leaks from the wheel cylinder, you will need to replace it. After you are done, you will need to bleed the brakes.
6. Reassemble The Drum Brake Shoe Assembly With The New Part(s)
Take these steps:
- Clean the backing plate with brake cleaner
- If your drum brakes are also the parking brake, install the parking brake lever and retaining clip.
- Install the adjusting screw assembly.
- Install the new brake shoes into the hub.
- Install the hold down springs in the reverse order of removal.
- Install the return springs in the reverse order of removal.
- Adjust the brakes until the brake shoes expand. Expand the shoes until you can barely slide the drum over the shoes.
- Adjust the screw to loosen the shoes by about 12 notches.
7. Install The New Brake Drums
If your new drums are coated in a thin oily film, clean it off with brake cleaner before installing them.
To install a new brake drum, slide it over the brake shoes and then secure it in place. Some drums will have retention screws, and others will not.
8. Make Final Adjustments

After you secure the brake drum in place, you will likely need to adjust the brake shoes. If your brake shoes are too loose or too tight, you’ll encounter issues with your brakes. If the shoes are too tight, the drum brakes can overheat.
Stick the drum brake adjuster tool or a flathead screwdriver through the adjuster access port on the back side of the backing plate. Turn the adjuster to loosen or tighten the brake shoes. Your goal is to achieve minimal or zero drag on the inside of the drum when you turn it by hand.
9. Put The Wheels Back On The Vehicle
After putting the wheels back on, tighten the lug nuts until they’re snug.Then tighten all the lug nuts to torque specs.
10. Test The Brakes
First, pump the brakes with the brake pedal. Next, take your vehicle out for a test drive. Make sure that your new drum brakes are operating normally.


